Setting up DeepDyve on Microsoft Azure SSO (SAML, Security Assertion Markup Language)
1. Access Azure Portal
- Go to portal.azure.com
- Navigate to "Enterprise applications"
- Click on "New application"
2. Create Your Application
- Click on "Create your own application"
- Name your app: Enter "DeepDyve SAML"
- Select purpose: Choose "Integrate any other application you don't find in the gallery (Non-gallery)"
- You'll be redirected to the DeepDyve enterprise application Overview page
3. Set Logo
- Navigate to Manage >> Properties >> Logo
- Add DeepDyve's logo, available here
4. Set Up Single Sign-On
- Navigate to Manage >> Single sign-on
- Under ‘Select a single sign-on method’ select ‘SAML’
5. Configure SAML Settings:
a. Basic SAML Configuration:
- Identifier (Entity ID): https://azure-sso.deepdyve.com
- Reply URL (Assertion Consumer Service URL): https://www.deepdyve.com/azure-saml/acs
- Sign on URL: https://www.deepdyve.com/azure-saml/<company-name>
- (Note: Replace "<company-name>" with the value provided by your DeepDyve contact)
b. Attributes & Claims:
- Click on “Edit”; your screen will look something like the following:
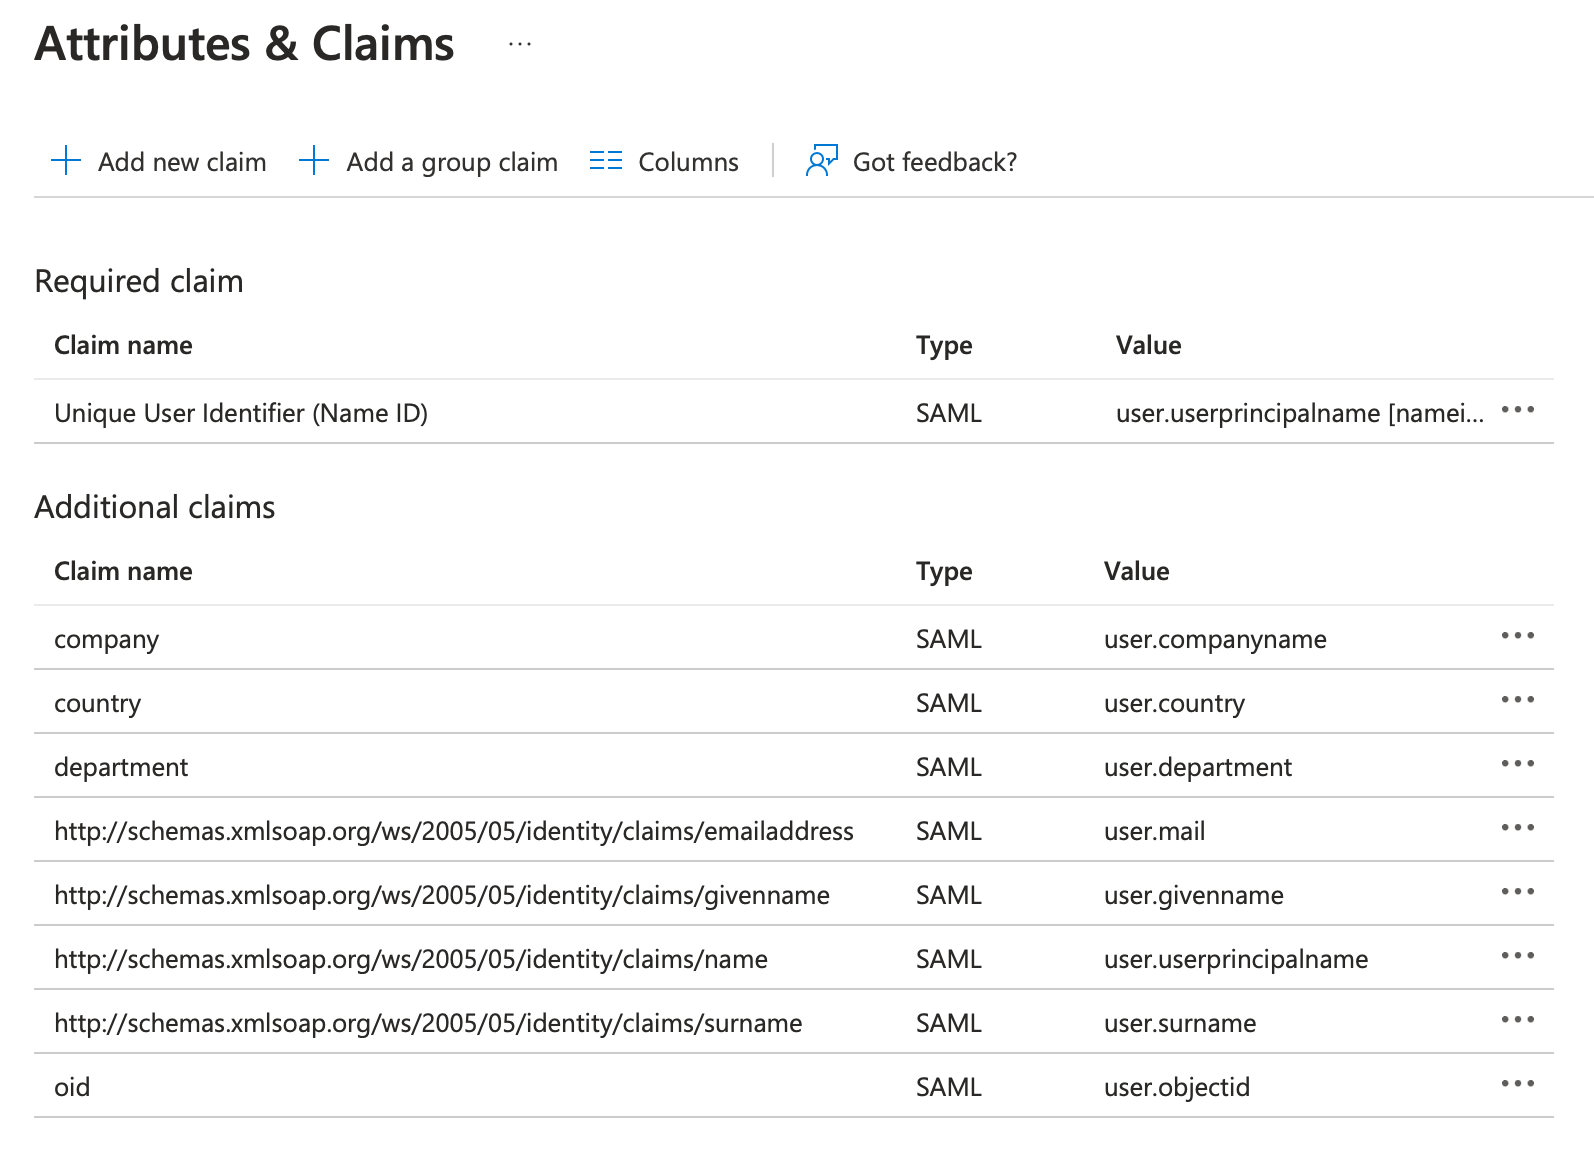
- Map the following attributes:
- Unique User Identifier >> user.userprincipalname
- givenname >> user.givenname
- surname >> user.surname
- emailaddress >> user.mail
- name >> user.userprincipalname
- oid >> user.objectid
- company >> user.companyname
- country >> user.country
- department >> user.department
- Please note: the 'Unique User Identifier' is typically set to 'user.userprincipalname', which in most cases is the user's email address. If your organization uses a different identifier instead of the email address, please inform your DeepDyve contact of the specific attribute used.
c. SAML Certificates:
- Download the "Certificate (Base64)"
d. Set up DeepDyve:
- Note down the "Login URL" and "Microsoft Entra Identifier"
e. Test single sign-on:
- Skip this step for now
6. Provide Information to DeepDyve
- Send the following items to your DeepDyve contact:
- The SAML certificate (Base64), as an email attachment, from step 5c
- Login URL from step 5d
- Microsoft Entra Identifier from step 5d
- After DeepDyve receives these items, we will complete the setup on our end and instruct you on how to test the integration
7. Switch current users to SSO
Some users may have had individual passwords in DeepDyve; when we turn on SSO, those will be disabled and SSO will be their only login method. You and your DeepDyve account manager will agree on a date for this to happen. This article describes how to switch these accounts to Microsoft Azure.